Billing & Subscription
The Billing & Subscription page is where you choose a plan and manage all aspects of your subscription. It is for hosted VSEC subscriptions. The page has two states: a plan setup flow if you do not yet have a subscription, and a full management view once one is active.
Getting Started
If you do not have an active subscription, this page walks you through a setup wizard of up to four steps: Plan, Benches, Add-ons and Workspace. The Add-ons step appears only when your plan has optional add-ons.
Step 1: Choose Your Plan
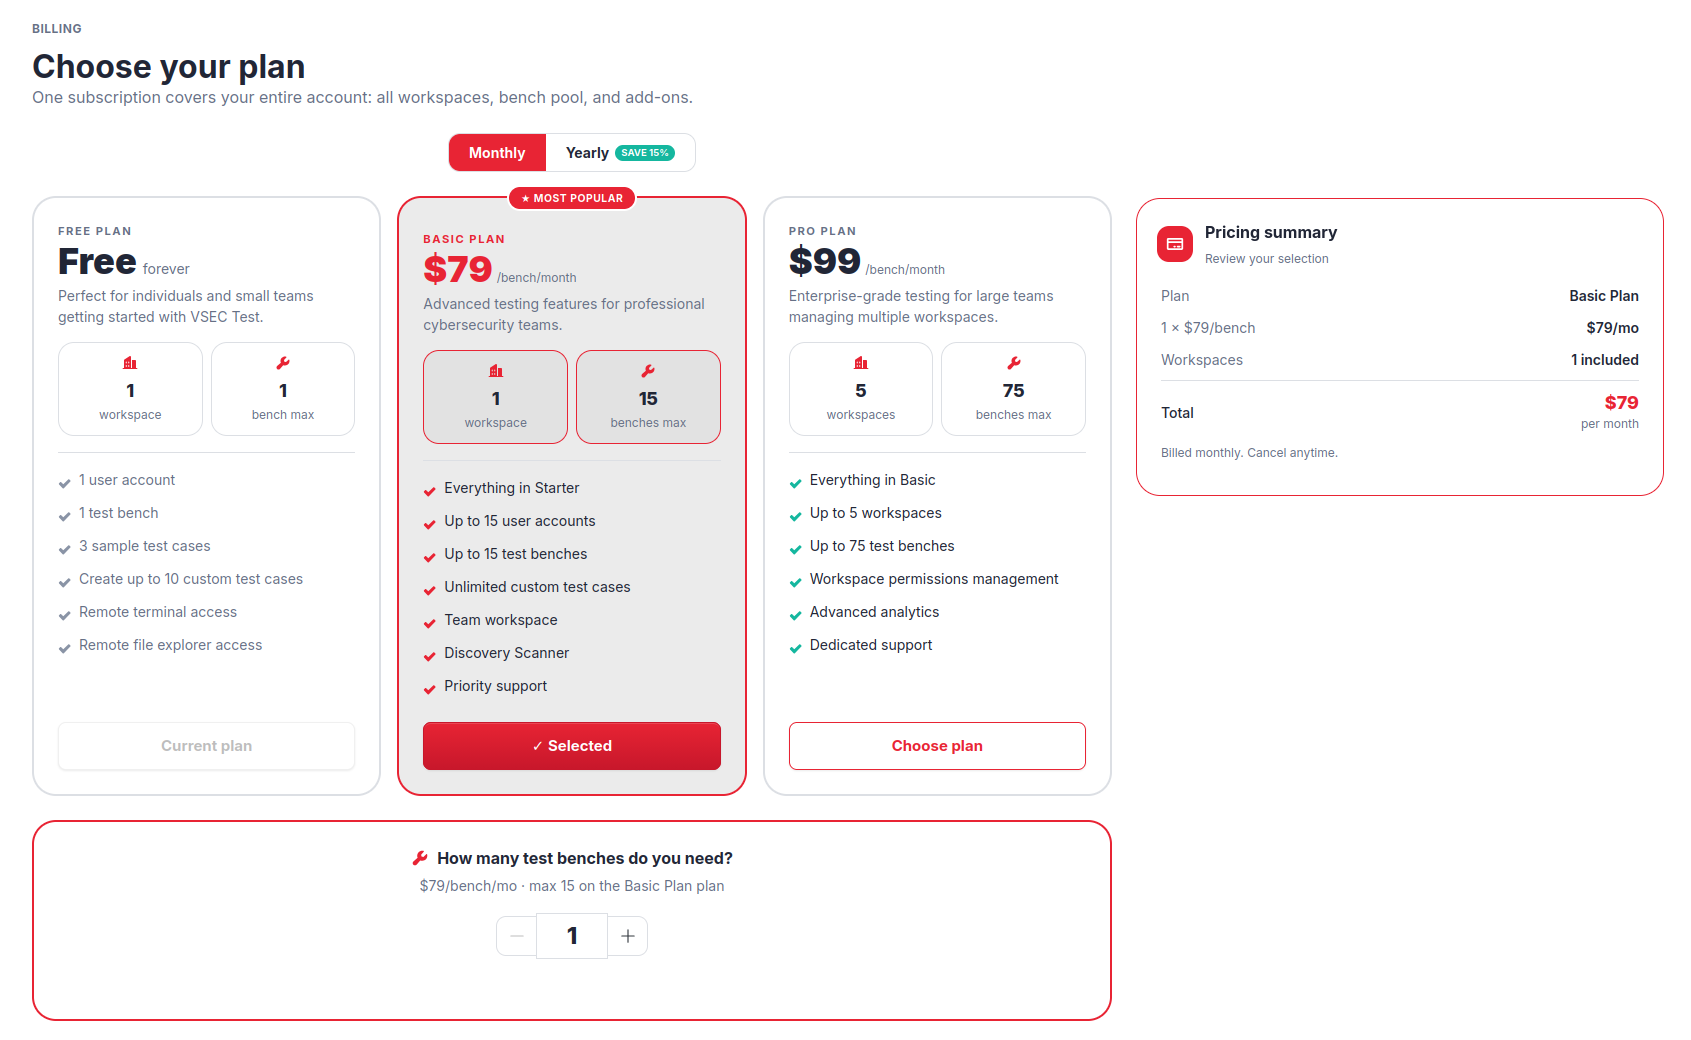
- Toggle between Monthly and Yearly billing at the top. Yearly billing saves 15%.
- Click
Choose planon any paid plan card to select it. - Click
Continue to bench count.
Step 2: Choose Your Benches
Use the bench quantity stepper to set the number of test benches you need, up to the maximum for your plan. The Pricing summary on the right updates live. Click Continue to add-ons, or Continue to workspace setup if your plan has no add-ons.
Step 3: Add-ons
Click Add to plan on any optional add-on you want, then click Continue to workspace setup.
Step 4: Set Up Your Workspace
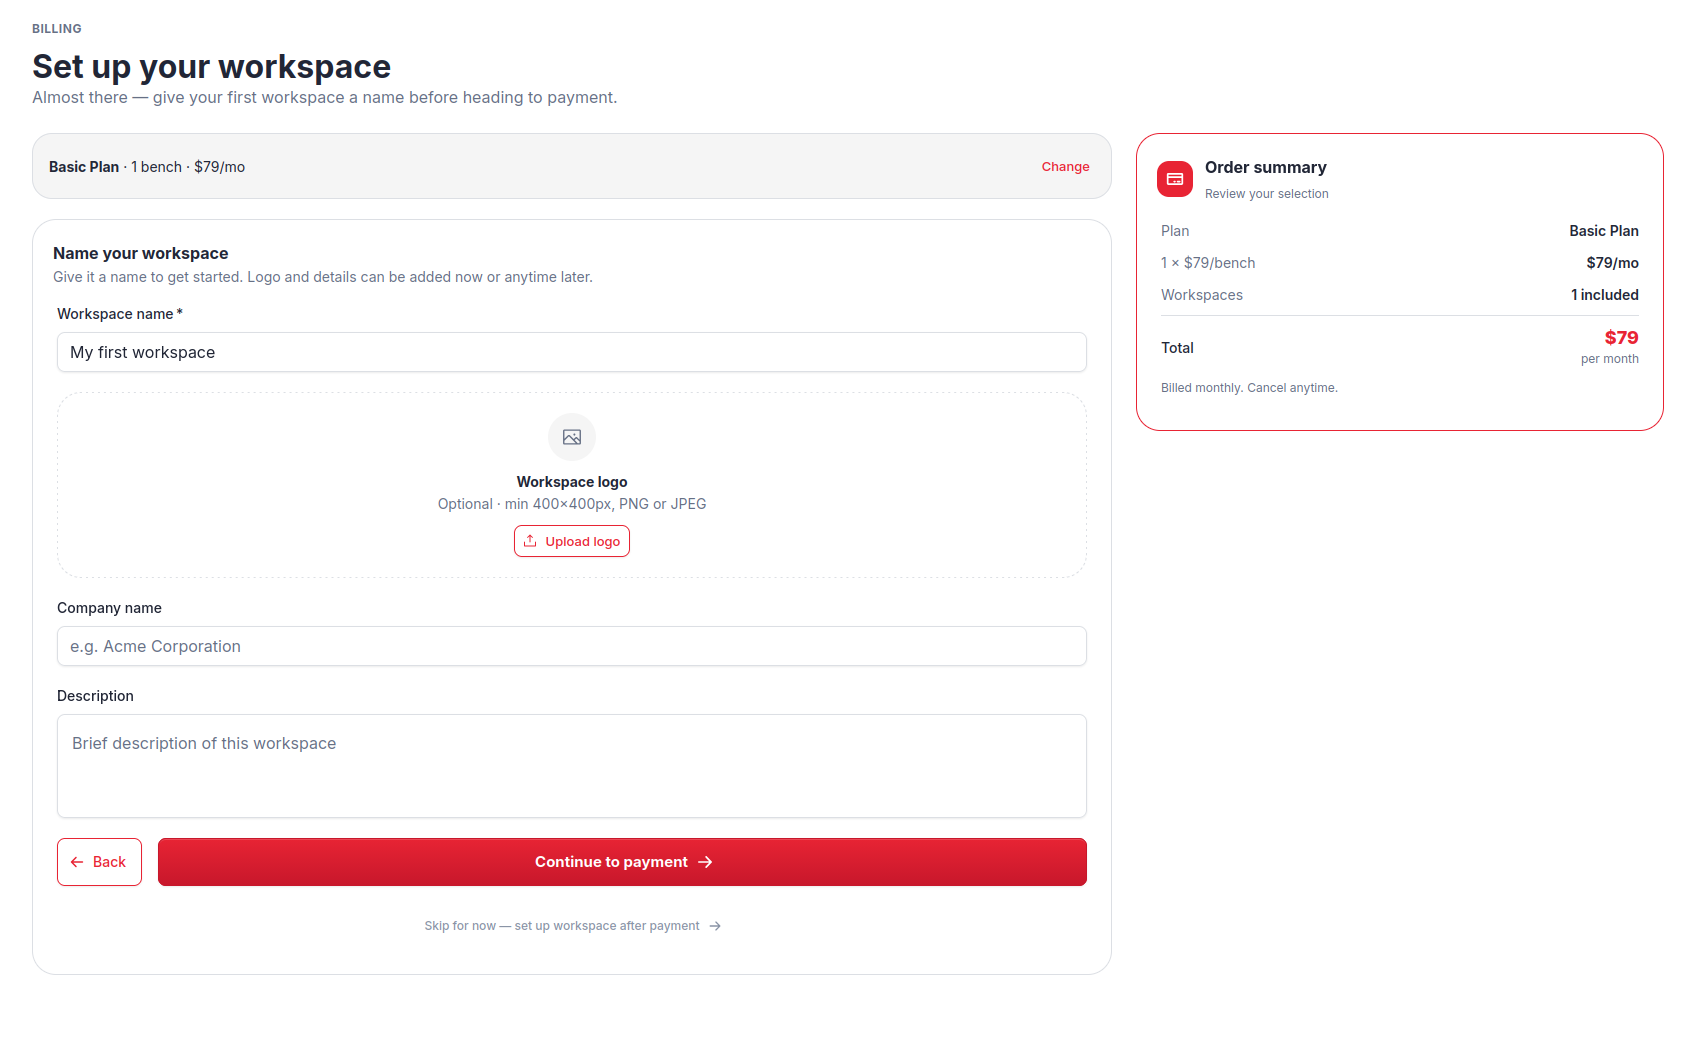
- Enter a workspace name (required).
- Once you start typing, additional optional fields appear: logo (PNG or JPEG, at least 400 x 400 px), company name, and description.
- Click
Continue to paymentto create your workspace and proceed to Stripe checkout.
Prefer to set up your workspace after payment? Click Skip for now — set up workspace after payment to go directly to checkout without creating one first.
Managing an Active Subscription
Once a subscription is active, this page shows the full management view.
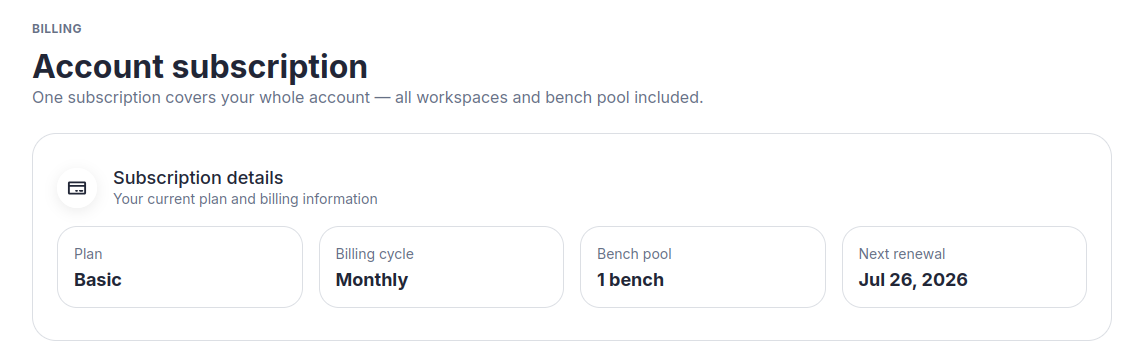
A header row shows your plan name, billing cycle, and status. Click Payment history to view all past invoices. Each entry includes the date, items, amount, status, and a PDF download link for the invoice.
Four stat tiles display: Plan, Billing cycle, Bench pool, and Next renewal.
Managing Benches
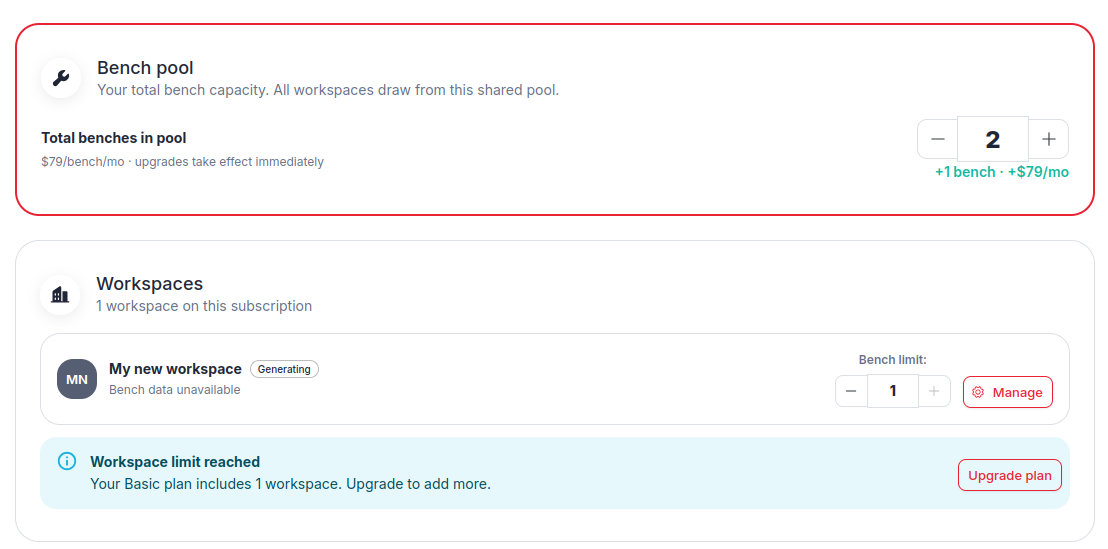
The Bench pool card shows your total bench count across the subscription. Use the stepper to increase it, up to a maximum of 200 benches.
Increasing the count adds the change to the Pricing summary on the right, alongside any add-ons you have added. Review the new total and click Continue to checkout to apply all pending changes at once. The additional cost is prorated for the rest of the current billing period. Click Discard changes to clear them instead.
Managing Workspaces
The Workspaces card lists each workspace on your subscription. For each workspace you can see its current live bench usage, and use the bench limit stepper to control how many benches from the pool that workspace may use.
When all workspace slots are in use, an alert indicates the limit has been reached. A dashed Add another workspace card appears at the bottom of the list when a slot is available.
Use the Manage button on any workspace row for quick links to its Members, Roles, Notifications, Integrations, and Activity Log pages.
Add-ons
If optional add-on products are available for your plan, they appear in the Add-ons card.
- To add: click
Add to plan. The add-on goes into the Pricing summary; clickContinue to checkoutto buy it. The charge is prorated to your current billing period. - To remove: click
Remove add-on, thenConfirm removein the warning that appears. Access is revoked at the end of the current billing period; unused time is credited as proration.
Upgrading Your Plan
Click Upgrade to see the plans you can move to: higher-priced plans on the same billing interval. Downgrades are not available. Select a plan and click Confirm upgrade. The upgrade takes effect immediately and is prorated.
Cancelling Your Subscription
Click Cancel plan to begin the cancellation flow. A summary shows your Plan, Billing cycle, number of Active workspaces, and Access until date. Click Yes, cancel to confirm, or Keep subscription to close the dialog. Cancelling the plan also cancels every add-on.